How to erase something in a photo
If you have unwanted objects or people in a photo, you can easily delete them using the Erase tool in Photo Studio.
Automatic erasing in Photo Studio
To begin, click the Erase Objects tab and set the size of your brush with the slider. Then highlight the object or person you want to remove.
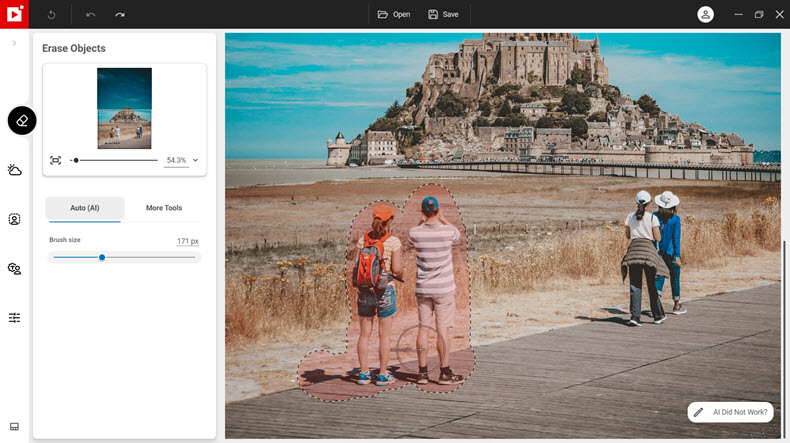
Photo Studio analyses the photo and erases the item.

Touching up with the Clone tool
If erasing the item has left blurry marks on your photo, you can fix this with the Clone tool. The Clone tool “copies and pastes” content from one area of the photo to another. This means you can use content from your chosen part of your photo to “fix” other parts.
Go to “More Tools” then “Clone”.
Select “Source to duplicate” and click a source point on your image to clone from.
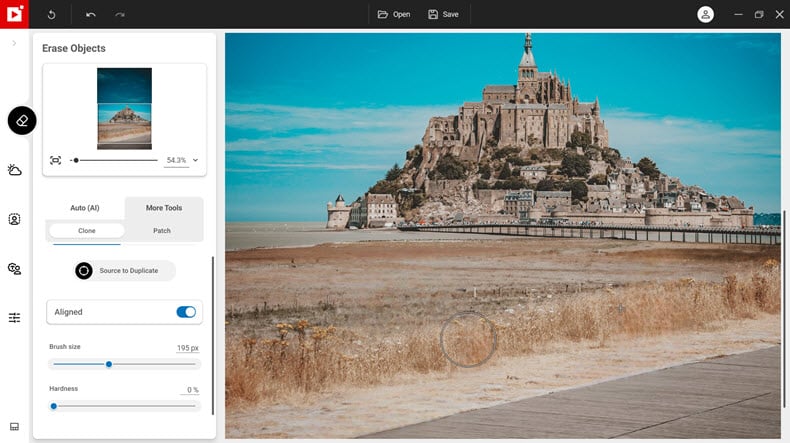
Next; click to paste this content over the blurry area. You can adjust the size and hardness of the brush with the sliders.
To change your source point, click “Source to duplicate” again, and select a new point in the photo. Then continue cloning until you’re happy with the result.
Join us!
If you want to learn faster, why not join our inPixio Facebook community, where thousands of inPixio users exchange tips about the software and share their photos.


Mastering Image Resizing: A Step-by-Step Guide on How to Resize an Image
How to Remove the Background from a Picture with inPixio: A Step-by-Step Guide

What are WebP files and how do you convert them?

5 Social Media Photo Tips for Busy Small Business Owners