How to use the creative tools
Bring a photo to life with the creative retouching tools. Miniaturise photo elements, add field depth to a photo to enhance the essential aspects, or “frame” a photo using the vignetting technique. The CREATIVE BLUR module will help you.
Using Creative blur
Step 1
Click on OPEN… in the main interface to select a photo.
Step 2

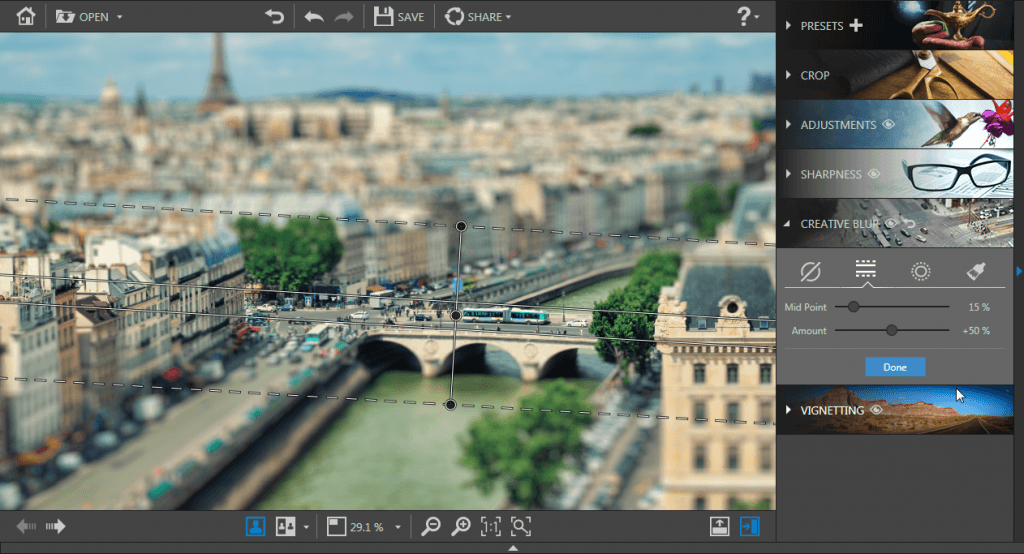
Click on the CREATIVE BLUR module, then click on the type of blur you’d like to use:linear blur, circular blur, customised blur (PRO version only). Then use the setting bars to adjust the blurs.
Linear blur (also called Tilt-Shift) Click on this button to miniaturise elements of the photo: a linear sharp area is added to the photo. Move and redefine the dimensions of this area using the sizing handles.
The sharp area is closed in on the bus in this example to make it look like a miniature bus.
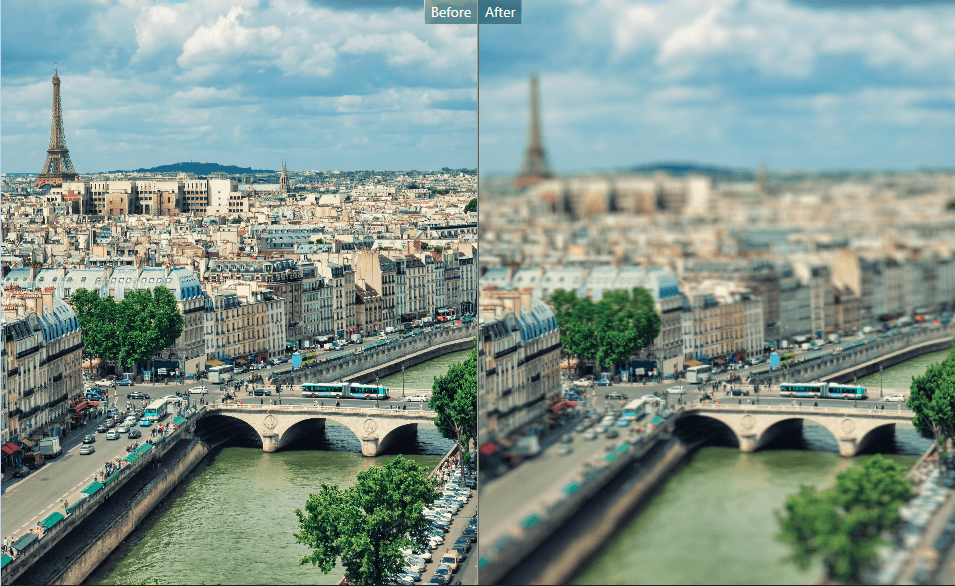
Use the Before / After button to appreciate your editing work.
You can fine-tune your linear blur using the setting bars:
Mid Point
Use the slider to define the width of the sharp area.
Amount
Move the slider to adjust the zoom level around the sharp area. Move it to the right if you’d like to accentuate the blur around the sharp area, or to the left to reduce the blur around the sharp area. The blur is removed if you move the Amount slider all the way to the left (0%).
 Circular blur
Click on this button to add field depth: a circular sharp area is added to the photo by default. Move or redefine the dimensions of this area using the sizing handles.

You can fine-tune your circular blur using the setting bars:
Feather
Move the slider to determine the width of the gradient between the blur and the sharp area of the photo. The more the values are increased, the more gradual the gradient between the blur and the sharp area of the photo.
Amount
Move the slider to adjust the zoom level around the sharp area. Move it to the right if you’d like to accentuate the blur around the sharp area, or to the left to reduce the blur around the sharp area. The blur is removed if you move the Amount slider all the way to the left (0%).
Step 3
Click on the SAVE button to confirm your changes and to save your photo to the desired location.By default, Photo Focus suggests renaming your retouched photo as Photo_modified.jpg and saving it to the same directory as your original photo. You can choose a new name and a new location if you wish to do so. Click on OK to confirm your choice.
Adjust the slider in the window that appears to define the quality of your photo, then click on SAVE.


Mastering Image Resizing: A Step-by-Step Guide on How to Resize an Image

How to Remove the Background from a Picture with inPixio: A Step-by-Step Guide

What are WebP files and how do you convert them?

5 Social Media Photo Tips for Busy Small Business Owners