How to remove blur from a photo
So, you’ve taken a photo quickly, used the wrong presets while shooting or simply want to improve the quality of your shot. The Sharpen! 1-Click Assistant and the SHARPNESS module will help you.
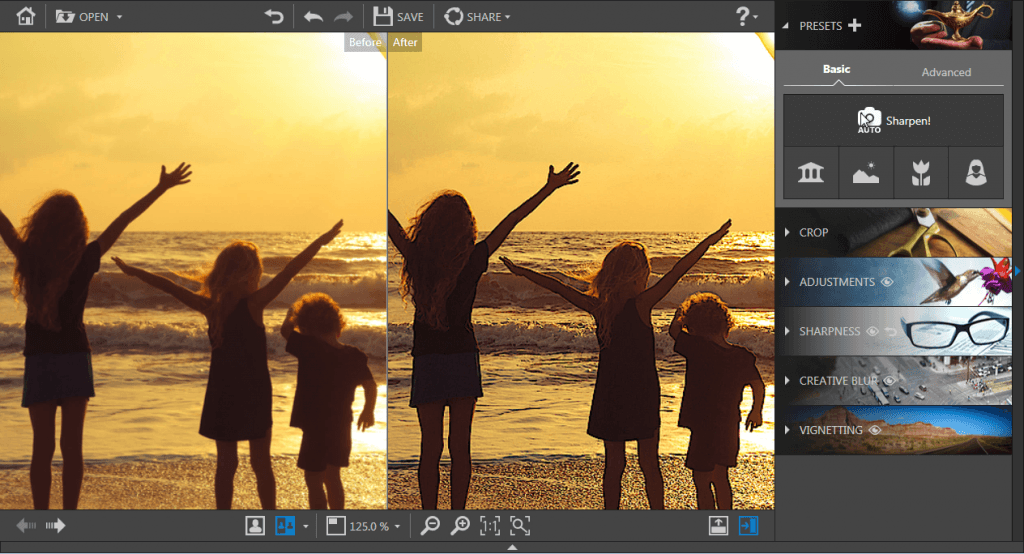
Step 1
Click on OPEN… in the main interface to select a photo.
Step 2
Click on the PRESETS module, then on the Sharpen! button.

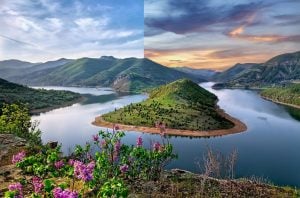
The photo is sharper and displayed in a Before / After view by default.
Note:
If the photo rendering stays the same or if the result is mixed, your photo may lack detail, be underexposed or have been taken with a low-resolution smartphone.
Don’t hesitate to try and adjust the sharpness of your photo manually from the SHARPNESS module (see the tutorial entitled “How to adjust sharpness manually”).
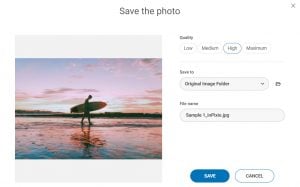
Step 3
Click on the SAVE button to save your photo to the desired location. By default, Photo Focus suggests renaming your retouched photo as Photo_modified.jpg and saving it to the same directory as your original photo. You can choose a new name and a new location if you wish to do so. Click on OK to confirm your choice. Adjust the slider in the window that appears to define the quality of your photo, then click on SAVE.


Mastering Image Resizing: A Step-by-Step Guide on How to Resize an Image
How to Remove the Background from a Picture with inPixio: A Step-by-Step Guide

What are WebP files and how do you convert them?

5 Social Media Photo Tips for Busy Small Business Owners