5 easy photo effects to enhance a photo in one click
Photo effects are great for giving your pictures a quick boost without spending hours editing. In this tutorial you’ll learn 5 easy photo effects in Photo Studio.
You will find all these photo effects in the Edit Photo tab.
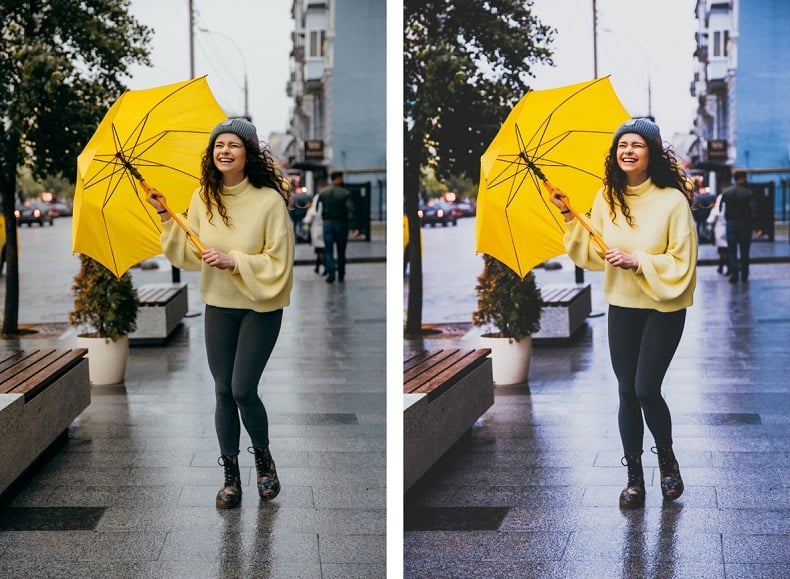
1. Add a Filter
Filters change settings on your photo. Adding a filter can completely transform the mood of your photo, and it’s really easy to do.

- Filters are available in the Auto (AI) section of the Edit Photo tab.
- Scroll through the list of filters and click one to test it on your photo.
2. Add a Frame
A digital frame provides the perfect finishing touch to a photo. Photo Studio offers frames for every style of picture, as well as special themed frames for different events/seasons.
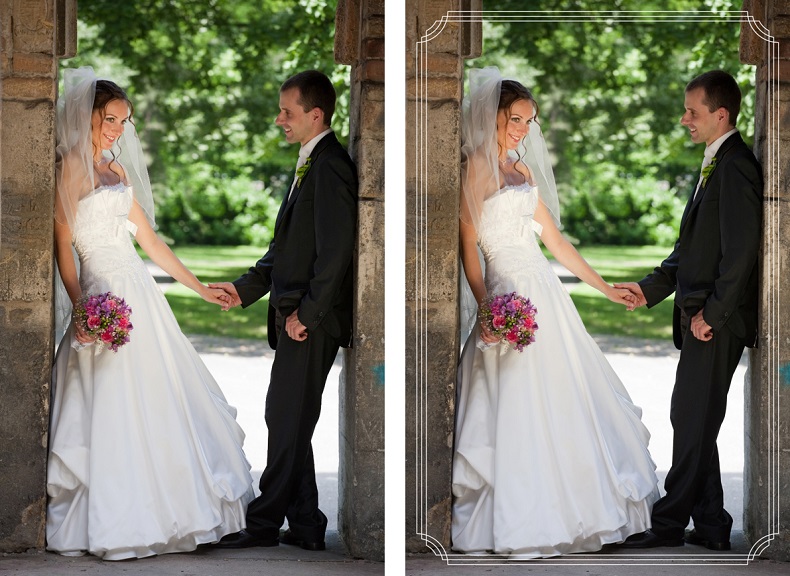
- Select Creative, and then Frames
- Scroll through the categories of borders and click one to test it on your photo.
- Use the options to adjust your frame to fit your photo: change scale, color and rotation as desired.
3. Add a Texture
Textures are overlays that add another layer to your picture. Like filters, and LUTs they instantly change the appearance of a photo. Textures can give an artistic and even surreal effect to a picture.

- Select Creative, and then Textures
- Scroll through the categories of textures and click one to test it on your photo.
- Adjust the intensity of the effect using the Opacity slider at the bottom of the Textures tab.
4. Add a LUT Style
LUT styles are similar to presets in that they instantly change the look of your photo. A LUT remaps colors in the photo for a creative effect.
- Select Creative, and then Textures
- Scroll through the categories of styles and click one to test it on your photo.
- Adjust the intensity of the effect using the Opacity slider at the bottom of the LUTs tab
5. Add a vignette
A vignette effect darkens or lightens the corners of a photo to put a subtle focus on your subject.
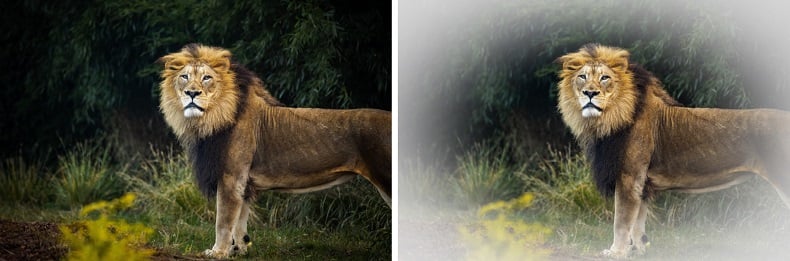
- Go to Tools, then Effect and select Vignette
- Move the Amount slider to the right to lighten the edges of the photo, or to the left to darken them.
- Expand the menu to access further options for adjusting your vignette.
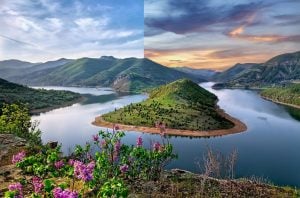
Using a Before/After View
Whichever edits you use to enhance your photo, compare your new picture to the original by using a before/after view.
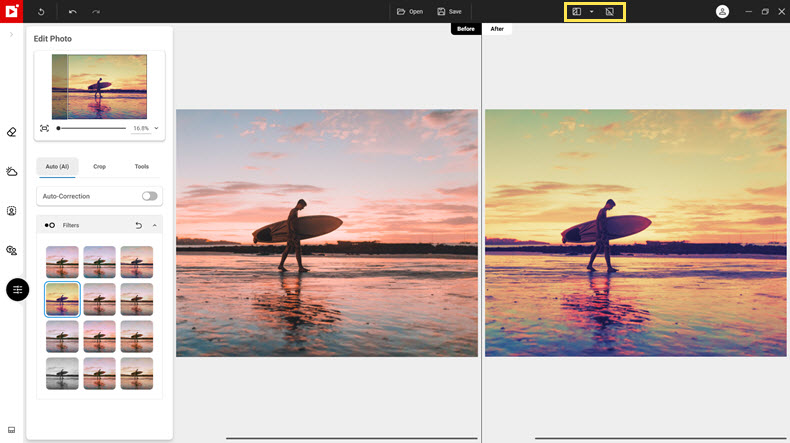
In the top toolbar click Before/After views then select a view from the list. You can also edit directly in a before/after view to see your changes as you work.
Join us!
To learn more quickly and for lots more tips and tutorials, join our Facebook group!


Mastering Image Resizing: A Step-by-Step Guide on How to Resize an Image
How to Remove the Background from a Picture with inPixio: A Step-by-Step Guide

What are WebP files and how do you convert them?

5 Social Media Photo Tips for Busy Small Business Owners