How to install the free editor
To start enjoying inPixio’s free photo editor, all you need to do is download the software and create an account.
Downloading the software
You can download the software from the free editor page.
Click on the downloaded file at the bottom of your screen. Alternatively, save the .exe file to your desktop and double click to start installation. Then follow the steps in the installation wizard.
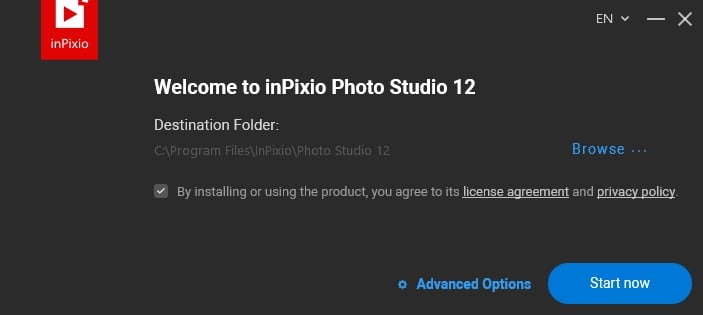
The software will open in Demo mode, meaning that all your pictures will contain watermarks. To access the free features with no watermark, you need to create an account.
Creating an inPixio account
When you first open the program, you’ll see the “Create an account” window.
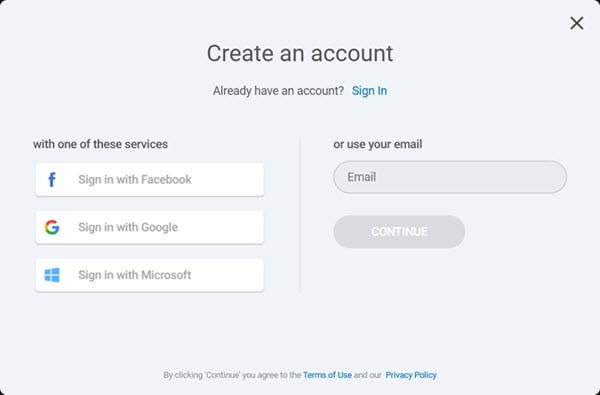
- Enter your email address and click continue. Or sign in via Facebook, Google or Microsoft.
- Then check your inbox for an email from inPixio.
- Clicking on the link in the email will verify your account.
Now all you need to do is go back to your software and click “I validated my account”. Then you’re ready to start editing.
Free trial and premium features
Please note that when you activate your inPixio account you will immediately start a free 5-day trial of Photo Studio with access to all features. At the end of this period, the software will automatically switch to the free version.
Some tools are not available in the free editor, these are marked “Premium”. You can still test these tools; a watermark will be added to the picture. Find out more about the features available for free editing.
System requirements
Photo Studio 12 works on Windows 8 (64-bit) 10 and 11. The recommended configuration is as follows:
- Processor Intel® Core i3 or better
- 8 GB of RAM
- 2 GB of free disk space, mouse and keyboard
- Internet connection
- Screen resolution 1024 x 768
The software is available in several languages, including English (US/UK), French, German, Italian and Spanish.


Mastering Image Resizing: A Step-by-Step Guide on How to Resize an Image
How to Remove the Background from a Picture with inPixio: A Step-by-Step Guide

What are WebP files and how do you convert them?

5 Social Media Photo Tips for Busy Small Business Owners