How to add a color background to your photo
Learn how to add a color background to a picture in just a few clicks and how to customize your color background with gradients.

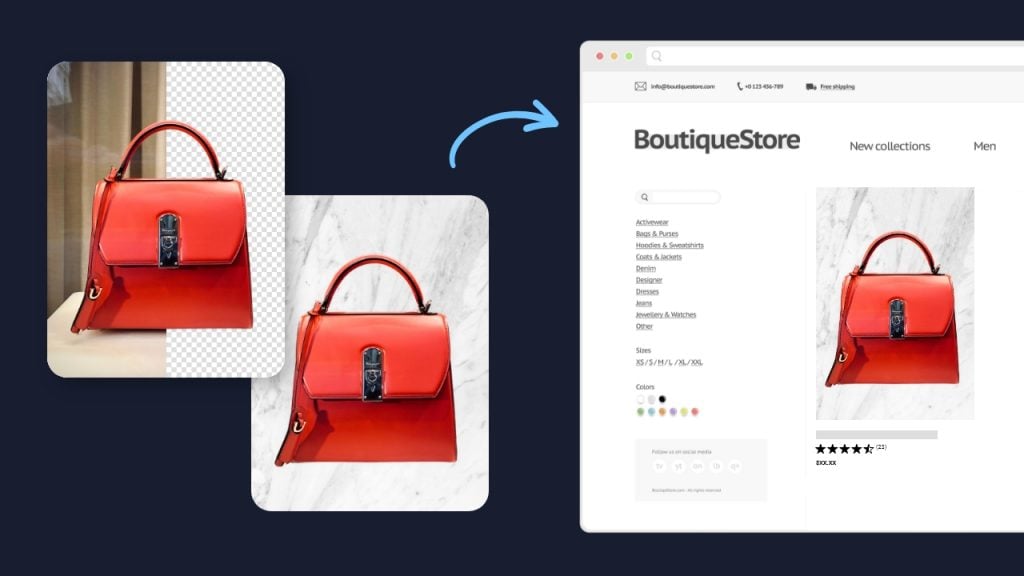
With Photo Studio it’s easy to remove and replace a photo background. The program provides a wide choice of fun backgrounds, and you can even import your own backgrounds to use as pictures.
But what if you want to add a simple color background to your picture? For example, a clean white background for product shots, or a pastel background on a portrait photo. This is also possible in Photo Studio, simply follow the steps below.
If you don’t already own Photo Studio you can download a free trial to test this:
Step 1 – Remove the existing background
Open your photo in Photo Studio and go to the “Remove Background” tab.
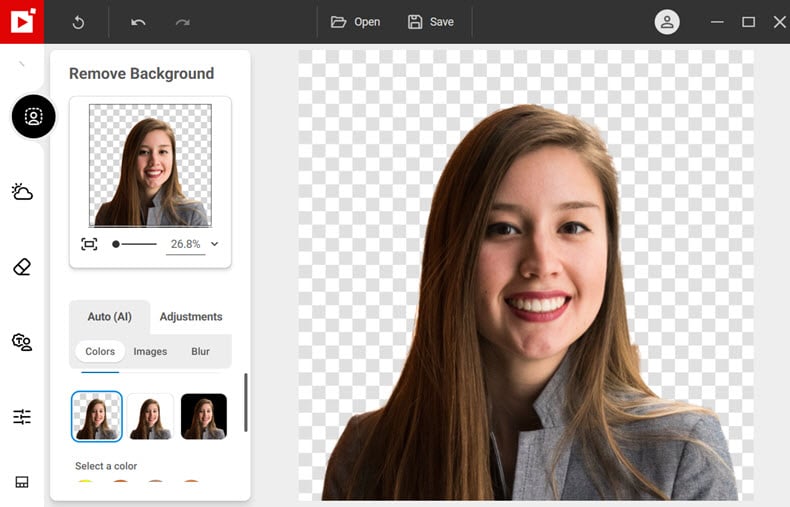
Photo Studio removes the original background automatically, using AI to detect the subject of your photo. You can find more information about background removal in this tutorial.
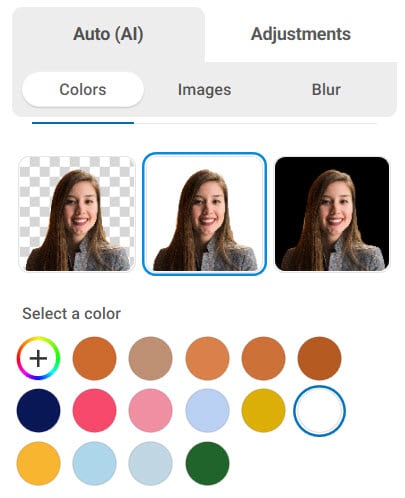
Step 2 – Select a background color
Once your background is gone, click “Colors” in the “Auto (AI)” tab.
You can now immediately select a white background, black background or transparent background.
For more color choices click the + to open the color selector.
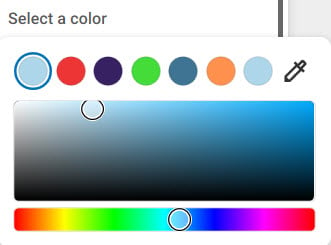
There are two ways to choose a color:
1. Choose from the color selector
First select a shade by clicking the horizontal bar. This will update the colors in the larger panel.
Next, click in the larger panel and move the circle to select a more precise color. Click outside the color selector to add the new color to your image.
Tip: previously used colors appear in the main “Colors” menu next to the +. This makes it easy to find the same shade next time without opening the color selector.
2. Pick a color from your photo
You can also choose a color from your foreground image to use for the background.
To do this, click + to open the color selector, then select the pipette icon. Next, click your photo to pick the color.
Deselect the pipette and click outside the color selector to add the color to the photo.
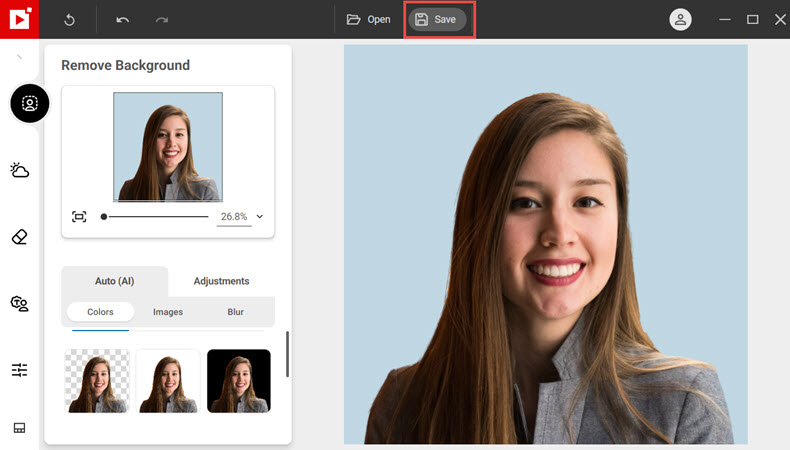
Step 3 – Save your photo
Once you’re happy with the background color, click “Save” in the main Photo Studio toolbar and continue editing.
How to create a color gradient background
In addition to solid color backgrounds, you can also add gradient color backgrounds to your photo.
A gradient background combines two colors and changes gradually from the first to the second color.

Two types of gradient are available in Photo Studio:
Linear Gradient: The color progression is applied in a straight line (from left to right).
Radial Gradient: The color progression is applied in a circular manner (from the center outwards).
Follow the steps below to add a color gradient background.
1. Select the type of gradient
Click the “Adjustments” tab, then “Background”. By default, “solid color” is selected. Click the icons to select either linear or radial gradient.
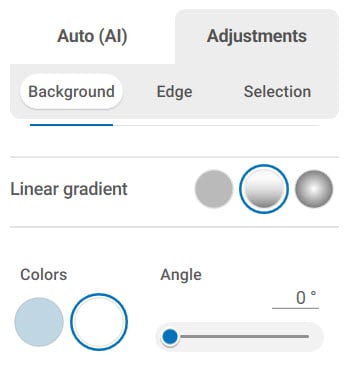
2. Choose colors
Select 2 colors to use in your gradient. Click on one of the color boxes to open the selector, then choose a color as shown in the first part of this post. A preview of your gradient appears in the panel underneath “Colors”.
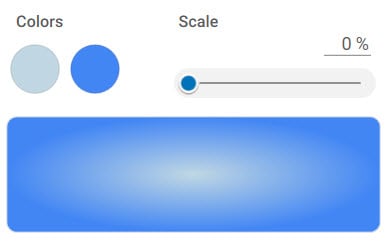
3. Adjust scale/angle
For radial gradients, you can adjust the size of your gradient using the “Scale” slider. Move the slider to the right to increase gradient scale.
For linear gradients, you can adjust the direction of your gradient using the “Angle” slider. Move the slider to the right to adjust the gradient angle. For example, to reverse the colors in your gradient, select a 180-degree angle.

If your subject doesn’t fit well with your new color background, you can use the Edit Photo tools to adjust and enhance the photo. For photos of people, you can also check out our tips for retouching portrait photos.
Join us!
If you want to learn faster, why not join our inPixio Facebook community, where thousands of inPixio users exchange tips about the software and share their photos.


Mastering Image Resizing: A Step-by-Step Guide on How to Resize an Image
How to Remove the Background from a Picture with inPixio: A Step-by-Step Guide

What are WebP files and how do you convert them?

5 Social Media Photo Tips for Busy Small Business Owners